
I played a game versus another Chaos Space Marine army this afternoon.
Army Lists
Here is my 2000 point army list:
Chaos Space Marines (Primary Detachment)
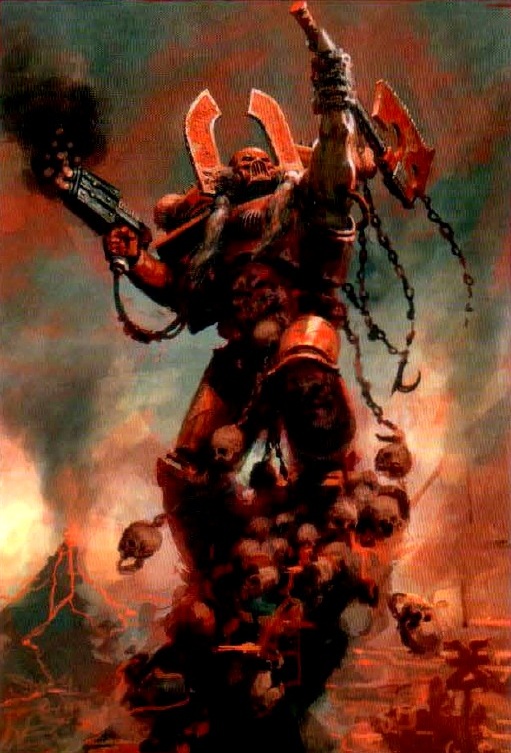
Kharn (deploys with squad of 7 Berserkers in 1st land raider)
6x Berserker /VotLW (Veterans of the Long War)
Berserker Champion /Lightning Claw, Power Fist
Land Raider /Extra Armor, Dozer Blades, Dirge Caster
7x Berserker /VotLW (deploys in 2nd land raider)
Berserker Champion /Lightning Claw, Power Fist
Land Raider /Extra Armor, Dozer Blades, Dirge Caster
7x Berserker /VotLW
Berserker Champion /Lightning Claw, Power Fist
Rhino /Dozer Blades, Dirge Caster
Chaos Daemons (Allied Detachment)
Herald of Khorne /Juggernaught, Unholy Might, Fury of Khorne, Blessing of the Blood God
5x Blood Crusher /Fury of Khorne
8x Bloodletter
Daemon Prince /MoN, Wings, Iron Hide, Unholy Might, Cloud of Flies, Noxious Touch, Breath of Chaos
Here is my opponent's Chaos Space Marine army list to the best of my memory:
Chaos Lord /Mark of Khorne, Juggernaught, Axe of Blind Fury, Sigil of Corruption
Sorceror (Level 3 Psyker) /Chaos Space Marine Bike, Black Mace, Sigil of Corruption
10x Cultist
10x Cultist
9x Berserker
Champion /Power Sword
9x Chaos Space Marine /autocannon, plasmagun
Champion
9x Chaos Space Marine /autocannon, plasmagun
Champion
4x Havoc / 4x missile launcher (flakk)
Champion
Land Raider /extra armor, dozer blades
Maulerfiend
Heldrake
Heldrake
Mission
The mission had four objective markers (O) - three were placed fairly close together in a triangle over towards the opponent's long table edge (deployment was 12" from the long table edges)...
--------------------------------------------------------- (opponent's table edge)
++++++++++++++++++++++++++++++O++++
++O++++++++++++++++++++++++++++++++
+++++++++++++++++++++++++++++++++++
++++++++++++++++++++++O++++++++++++
+++++++++++++++++++++++++++++++++++
++++++++++++++++++++++++++++++O++++
+++++++++++++++++++++++++++++++++++
+++++++++++++++++++++++++++++++++++
--------------------------------------------------------- (my table edge)
Here is a picture from the game that better illustrates the actual position of the objective markers:

As you can see one marker is in the top right corner, one is close to the center, one is between the two Heldrakes and the one not shown is behind the upper left hand corner.
Night Fight was in effect on the first turn. Neither of us got a good Warlord trait and the Sorcerer had Invisibility, Puppet Master and Psychic Shriek.
Deployment
I got to deploy and go first. I placed both land raiders with the rhino behind them just to my right of the central hill. My preferred daemonic wave was the Herald attached to the Blood Crushers and the Daemon Prince.
My opponent deployed his Chaos Lord and Sorcerer attached to the bikers beside his land raider (Berserkers embarked inside) along with the Maulerfiend towards the middle of his deployment zone... the brick. He deployed his Havocs on a hill over to his left with one squad of Chaos Space Marines directly behind them. He also deployed one squad of cultists directly behind his brick. He held the other units (cultists and Chaos Space Marines) in reserves along with the two Heldrakes. My opponent attempted to seize but failed.
Pre-Game Analysis
I felt pretty good going into the match as my forces were positioned much closer to three of the four objective markers. My plan was to first focus fire on the Maulerfiend, then move up in position to hold those objective markers, forcing my opponent to come towards me. I also planned to try to ignore his two flyers (heh). He didn't have much in his army that was a threat to either land raider so I was also planning to try waiting until at least the third turn to launch any assaults. The Herald and it's Blood Crushers would act as a shield in front of my tanks while the Prince would act as a distraction and use Breath to plague my opponent's exposed troops. The Bloodletters have been relegated to acting as primarily an objective holder since I had to cut their size in half to accommodate points for the Prince - you'll also note I dropped the Skulltaker from the list along with chainaxes.
-1st Two Turns -
I got my primary wave of daemons dropping the Herald and Blood Crushers beside my land raiders while the Prince landed beside them out of range from the Havocs. By the end of the second turn I had scored First Blood popping the Maulerfiend and the land raider carrying the Berserkers sans Khsrn were in position to launch an assault on my opponent's biker brick with assistance from the Herald and Blood Crushers. One of the Heldrakes came in from reserve along with both the cultists (central) and Chaos Space Marines (behind the objective marker in my opposite right corner). So everything is looking good at this point in time.
- 3rd and 4th Turns -
My Herald and Blood Crushers fell just short of the distance required to charge my opponent's biker brick but my Berzerker squad made it into melee... Not good. My Berserker champion issued a challenge which was accepted by the Sorcerer - my champion scored one wound and managed to survive. My opponent's Chaos Lord fumbled a bit and only managed to kill three Berserkers. The Berserkers managed to kill a couple of the CSM bikers so that assault was a push... I really wish I could have dropped his Sorcerer in the initial melee. The next turn the Chaos Lord lost control of his axe (failed the check for his daemon weapon) but still managed to kill a few more of my Berserkers... My Berserker champion did manage to finish off his Sorcerer though. Failing the charge with my Blood Crushers really hurt as a pair of vector strikes from the Heldrakes plus shooting from the Havocs and my opponent's land raider finished them all off before they could attempt to charge again. My Bloodletters came in landing beside the rear objective marker and were safe for the time being. My Prince managed to finish of the rest of the bikers and scored one wound versus the Chaos Lord using his Breath attack after swooping over to the midfield.
Mid Game Thoughts
I needed Kharn and his unit of Berserkers to make a long push into my opponent's deployment zone to take the far objective marker... So I would have to use the Berserkers in the rhino to hold up my opponent's lone Chaos Lord - note that their transport was also destroyed by vector strikes from both of the enemy Heldrakes. Berserkers are hit on a 4+ versus a Chaos Lord armed with the Blinding Axe since this daemon weapon reduces the owner's weapon skill by -1 (WS5 versus WS5)... So while it's a big gamble it's better than nothing.
- Turns 5 through 7 -
We played out each of the final turns to see how the game would end on each of these turns. I lost on turn 5, won on the 6th turn and lost again on the last turn. I ended up with only Kharn and both land raiders left while my opponent still had both Heldrakes, his land raider, two cultists from one squad, his Havocs and one squad of Chaos Space Marines. I won't go into the details here... Refer to my post game analysis just below.
Post Game Analysis
The enemy Chaos Lord stuck himself in the eye hole several times throughout the game and eventually killed himself failing a grand total of three daemonic weapon tests... That said he always seemed to be in the right place at right time and the one time I was able to shoot him with one of my land raiders he passed both of his invulnerable saves - the lucky blighter !! He was a big threat on the ground and a painful thorn in my side - I had to keep funneling my resources to counter him. In hindsight I should have held back my Prince to finish him off rather than sending my FMC off all by his lonesome. Note that the Prince killed the enemy Berserker unit the turn after they disembarked... My opponent was hoping to ground the Prince with shooting so he could charge the beast but failed. This though left the Prince standing there firmly planted on the ground - he was then vector striked and shot down.
Kharn and his squad of Berserkers performed just as planned tank shocking one unit of cultists off an objective (breaking them) then laying waste to one enemy squad of Chaos Space Marines in the final turn and claiming another.
The Bloodletters never really had a chance once the enemy flyers focused on them. The Heldrakes by far did the most damage over the course of the game... Mainly due to their vector strikes. My army as it stands doesn't have a strong flyer defense and this game it really showed - so I will have to go back to the drawing board and see what I can come up with to better counter enemy flyers.
No comments:
Post a Comment